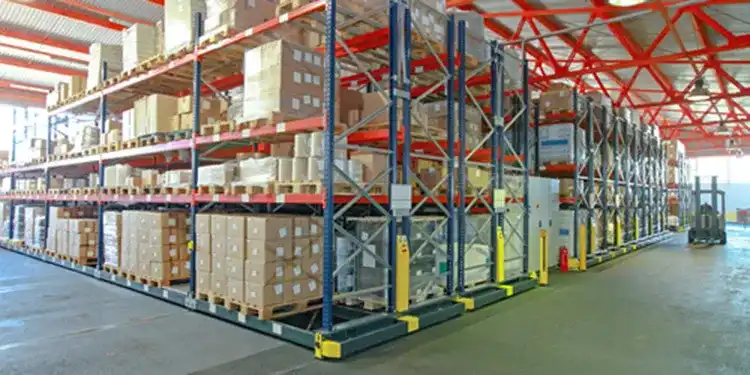
If you’re looking to organize your garage, warehouse, or home storage space efficiently, a boltless steel shelving unit is an best choice. These versatile storage solutions are known for their durability, ease of setup, and customizable design, making them ideal for heavy-duty use without the hassle of nuts and bolts. Unlike traditional shelving that requires tools like wrenches, boltless steel racks use a clever rivet-and-slot system for quick, secure assembly.
In this comprehensive guide, we’ll walk you through the process from start to finish, ensuring your boltless steel shelving unit stands strong and stable.
Why Choose a Boltless Steel Shelving Unit?
Before diving into the assembly, it’s worth understanding what sets boltless steel shelving units apart. Made from high-gauge steel, these racks offer superior strength, often supporting up to 800 pounds per shelf when properly assembled. Their bolt-free design not only speeds up installation but also allows for easy reconfiguration as your storage needs change.
Popular in commercial settings like warehouses and retail spaces, they’re equally practical for residential use in basements or pantries. Key benefits include rust resistance (especially with powder-coated finishes), affordability, and minimal maintenance.
If you’re searching for “best boltless steel shelving unit assembly tips,” this guide draws from industry standards to help you avoid common pitfalls and maximize longevity.
Essential Tools and Components for Your Boltless Steel Rack
Preparation is key to a smooth assembly. Gather everything in a spacious, well-lit area to prevent mishaps. Here’s what you’ll typically need for a standard boltless steel shelving unit kit(note that exact items may vary by brand, so check your product’s manual.)
Tools Required:
- Rubber mallet: Essential for tapping pieces into place without denting the metal. A wooden mallet works as an alternative, but avoid metal hammers to prevent scratches.
- Level: To ensure your shelves are even, preventing wobbles or uneven weight distribution.
- Gloves: Protect your hands from sharp edges during handling.
- Measuring tape: Useful for verifying heights and spacing if customizing shelf levels.
Key Components:
Your boltless steel shelving unit kit should include:
- Upright posts: These tall vertical beams form the frame’s backbone, usually in pairs for each end.
- Cross beams (short and long): Short ones connect the ends, while longer ones span the sides for depth.
- Shelf decks: Often particleboard, wire mesh, or metal panels that sit atop the beams.
- Optional center braces: For wider units to add midline support and prevent sagging under heavy loads.
- Post connectors: If building taller than standard height, these link extensions seamlessly.
- Caps and feet: Plastic or rubber inserts for the top and bottom of posts to safeguard floors and enhance stability.
Pro tip: Lay out all parts on the floor and count them against the inventory list. Missing a rivet or beam? Contact the manufacturer immediately to avoid delays.
Step-by-Step Assembly Instructions for Boltless Steel Shelving
Assembling a boltless steel rack involves creating stable end frames first, then linking them with horizontal supports. This modular approach ensures everything aligns perfectly. Aim for a flat surface, and enlist a helper for larger units to hold pieces steady.
Step 1: Prepare and Assemble the End Frames
Start by constructing the side structures that will bookend your shelving.
- Position two upright posts parallel on the ground, spaced according to your unit’s width (typically 36-48 inches apart—measure to confirm).
- Grab a short cross beam and align its rivets with the keyhole slots near the bottom of the posts. The beam’s flange should face inward for proper shelf support.
- Gently tap the beam downward with your rubber mallet until the rivets lock into the narrow part of the slots. Listen for a satisfying click.
- Repeat at the top with another short beam, forming a rectangular frame. Use your level to check for plumb alignment.
Duplicate this for the second end frame. Now you have two identical sides ready to connect.
Step 2: Connect the Frames with Side Beams
With the ends built, it’s time to bridge them.
- Stand one end frame upright and brace it against a wall or have a partner hold it.
- Attach long side beams to the front and back at the bottom level, inserting rivets into corresponding slots on both end frames.
- Hammer them securely, ensuring the beams are horizontal—use your level here to avoid tilting.
- Add top-level side beams similarly, creating a basic skeleton.

This step transforms your pieces into a cohesive unit. For added rigidity, double-check all connections by giving them a firm tug.
Step 3: Install Additional Shelf Levels and Supports
Customize your boltless steel shelving unit by adding intermediate shelves.
- Decide on shelf heights based on what you’ll store—taller items like boxes on lower tiers, smaller ones up top.
- Insert additional short and long beams at desired intervals, locking them in as before.
- For spans over 48 inches, slide center braces into the beam channels. Some designs require folding tabs with pliers for a snug fit.
- If extending height, attach post connectors by sliding them over the tops and tapping firmly, then add extension posts.
Step 4: Place the Shelf Decks and Finalize
The finishing touches make your unit functional and safe.
- Lay deck panels onto each beam level, ensuring they fit flush without overhanging.
- Snap on post caps at the top for a clean look and to prevent dust accumulation.
- Add feet or levelers at the base to protect flooring and adjust for uneven surfaces.
- For wall-mounted stability (recommended for tall or heavy-loaded units), use included anchors to secure the back posts.

Common Mistakes to Avoid and Pro Tips
Even seasoned assemblers slip up. Here’s a quick troubleshooting table to keep your boltless steel shelving unit flawless:
| Issue | Cause | Solution |
|---|---|---|
| Wobbly frame | Uneven beam locking | Re-tap rivets with mallet; use level on all sides. |
| Sagging shelves | Overloaded or missing braces | Add center supports; distribute weight evenly (heaviest on bottom). |
| Misaligned slots | Forced assembly | Align rivets carefully before hammering; avoid bending metal. |
| Floor scratches | No feet installed | Always add protective bases; felt pads work wonders on hardwood. |
Expert advice: Assemble in sections if space is tight. For outdoor use, opt for galvanized boltless steel shelving to resist corrosion. If disassembling later, tap upward on beams to release rivets gently.
Maintenance and Safety for Long-Lasting Boltless Steel Racks
To ensure your boltless steel shelving unit lasts years, perform regular checks. Wipe down with a damp cloth to remove dust, and inspect for rust in humid environments—apply a protective spray if needed. Safety first: Never exceed weight limits (check specs), and anchor to walls in earthquake-prone areas. Store chemicals or liquids on lower shelves to minimize spill risks.
Summary
Assembling a boltless steel shelving unit is a straightforward project that boosts organization without professional help. With these detailed steps, you’ll have a sturdy storage solution ready in under an hour. Ready to tackle yours?